Building a model train layout is a step-by-step process that rewards careful planning and patience. Since you already know the scale you will be using, this guide follows a clear chronological order, from early planning to final details, explaining what to do, which tools and materials you need, and how to use them safely.
The first step is deciding what kind of layout you want to build. Think about whether you prefer continuous running, realistic operations, detailed scenery, or a mix of all three. Consider the era, location, and general atmosphere you want to represent. A clear goal keeps later decisions focused and prevents unnecessary rebuilding.
Next, measure the area where the layout will be built. Record the length, width, and height, and note doors, windows, walkways, and power outlets. Make sure there is enough room to move around the layout comfortably and reach all areas. At this stage, also decide where lighting will be placed to ensure good visibility while building and operating.
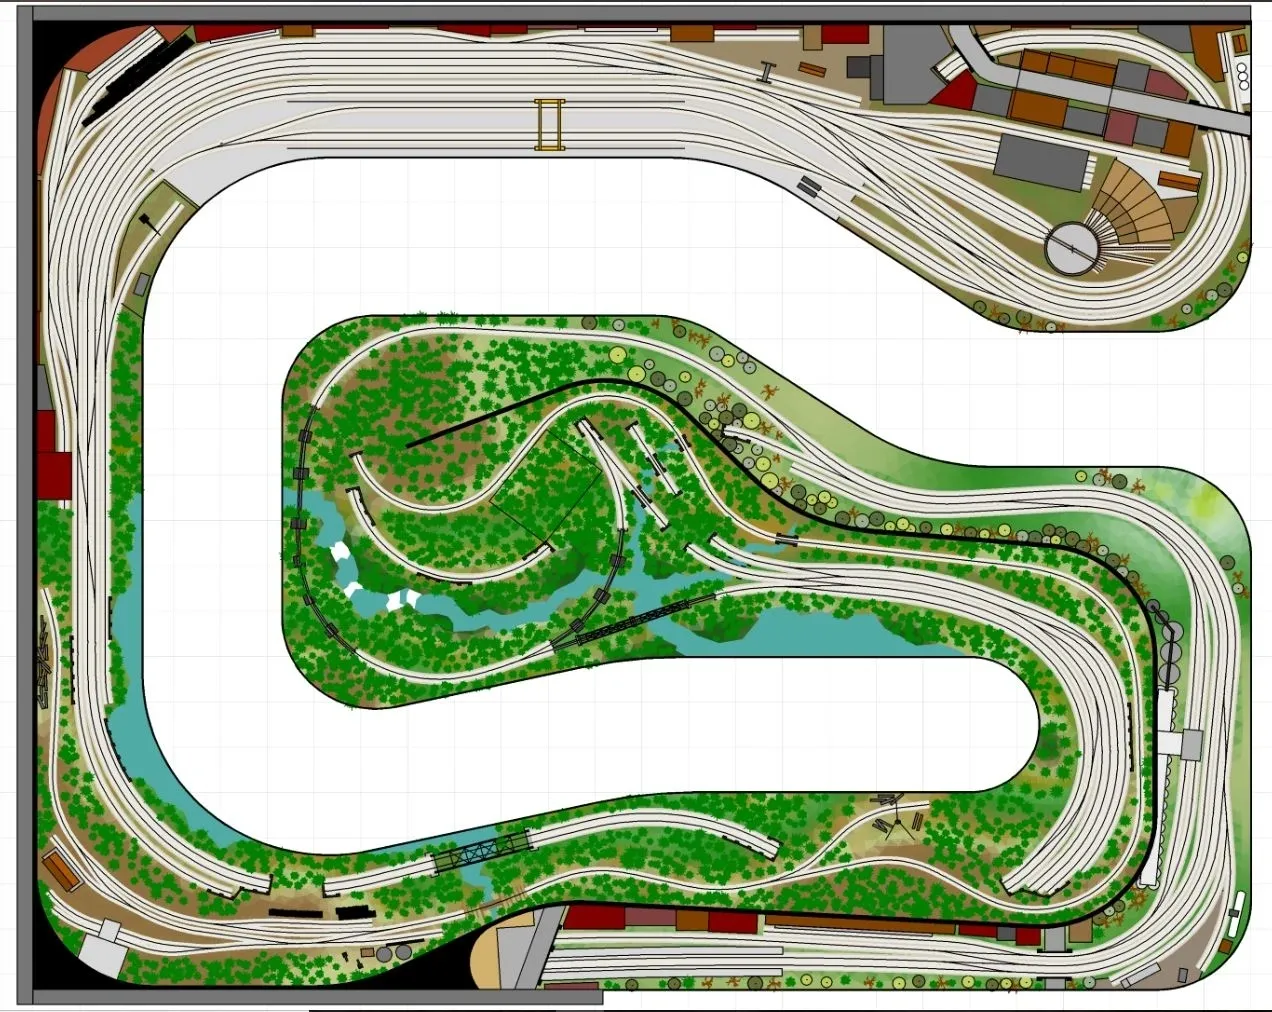
With the space defined, design the track plan. Decide where main lines, sidings, yards, and industries will be located. Keep curves as gentle as possible and avoid placing turnouts in difficult-to-reach areas. A well-planned layout at this stage saves time and materials later.
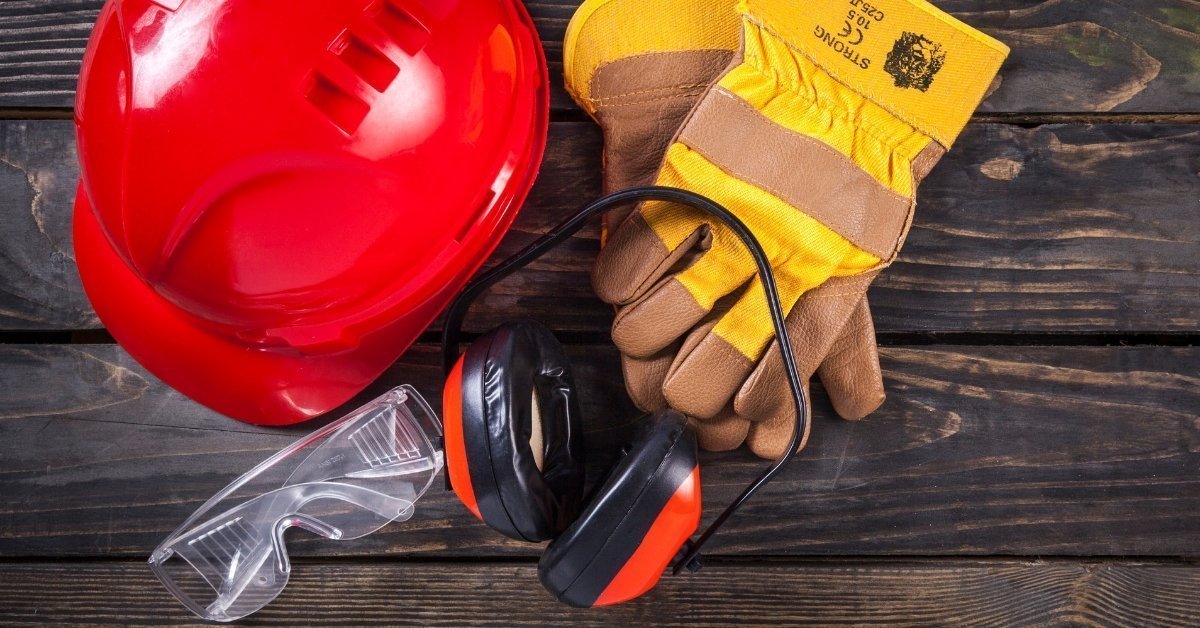
Before construction begins, assemble the correct tools and materials. Common tools include a tape measure, pencil, ruler, level, screwdriver set, small hammer, utility knife, saw, drill, and pliers. For track and wiring work, you may also need a soldering iron, wire cutters, and a multimeter. Safety is essential. Always cut away from your body when using knives or saws, wear eye protection when drilling or cutting, and work in a well-ventilated area when soldering or using adhesives. Keep tools organized and unplug electrical tools when not in use.
Materials needed: wood boards, screws, wood glue, legs or wall brackets, level
Use the wood boards to construct a sturdy frame that fits your planned layout
shape. Secure joints with screws and wood glue for strength. Attach legs or wall
supports and use a level to ensure the surface is flat. Strong, level benchwork
prevents track problems later.

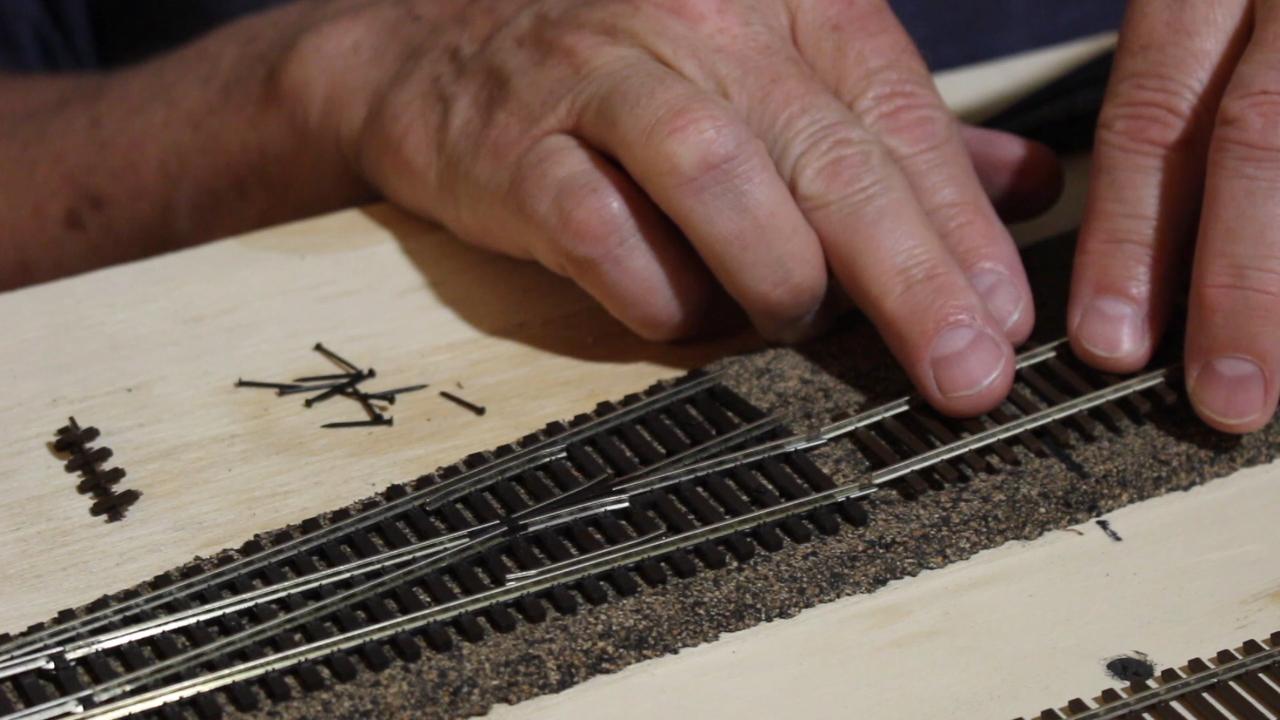
Materials needed: plywood or foam board, cork or foam roadbed, adhesive
Attach the subroadbed to the benchwork to create the base surface. On top of this,
glue the roadbed where tracks will run. The roadbed raises the track slightly and
helps reduce noise. Press it firmly in place and allow adhesives to fully dry.
Materials needed: electrical wire, power connectors, solder, soldering iron, wire clips
Run wires neatly beneath the layout, following a consistent color system. Solder
connections where necessary to ensure reliable power. Secure wires so they do not
hang loose. Test electrical sections frequently to confirm trains receive steady
power everywhere.
Materials needed: locomotive, rolling stock, power supply
Run trains slowly over the entire layout. Watch for derailments, power loss, or
rough spots. Make corrections now, before scenery is added, since access is
easiest at this stage.
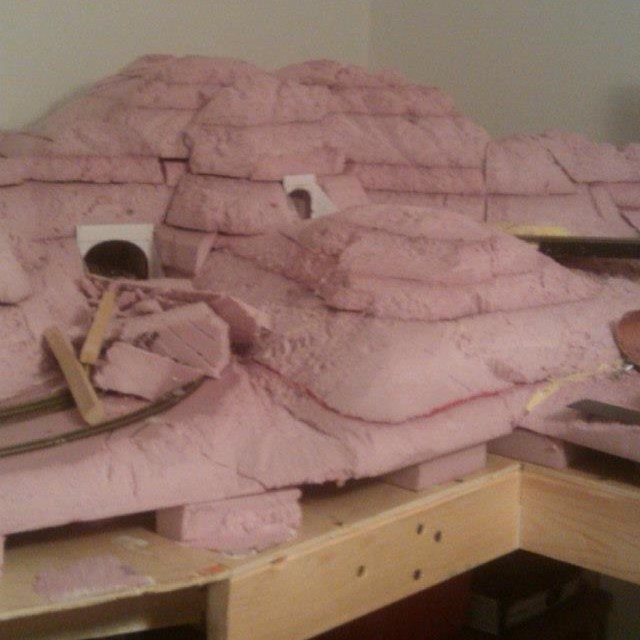
Materials needed: foam sheets, plaster cloth, lightweight filler, carving tools
Build hills, valleys, and embankments using foam or plaster cloth. Shape gently
and realistically, keeping access to tracks in mind. Allow materials to dry
completely before moving on.
Materials needed: paint, ballast, glue, brushes
Paint the terrain base to hide raw materials. Apply ballast between and alongside
the tracks, fixing it in place with diluted glue. This step blends the track into
the landscape and improves realism.
Materials needed: buildings, figures, vehicles, adhesive
Place structures logically in relation to tracks and roads. Secure them with
adhesive, but avoid permanently fixing items in areas that may need future access.
Add figures and small details to bring scenes to life.
Building a model train layout is a structured process that works best when each step is completed carefully and in order. Using proper tools, choosing the right materials, and working safely ensures fewer problems and better results. By taking your time and testing as you go, you create a layout that is reliable, realistic, and enjoyable for years to come.